Uploading data
Arvados Data collections can be uploaded using either Workbench or the arv-put command line tool.
Upload using Workbench
To upload using Workbench, first identify the project to upload the files into. This is done by browsing your projects in the navigation menu on the left, or to search for the project using the search field on the top.
Having navigated to the project, click on the + NEW button in the top-left corner. In the pop-up menu, select the item New collection.

In the dialog box that follows, you will be prompted to create a new collection in your chosen project. Here, the Collection Name field is required. After entering the name for this new collection (and optionally other fields), you have the choice to create it with new file updates — by drag-and-drop into the Files area or with the traditional file-upload dialog opened by your browser.
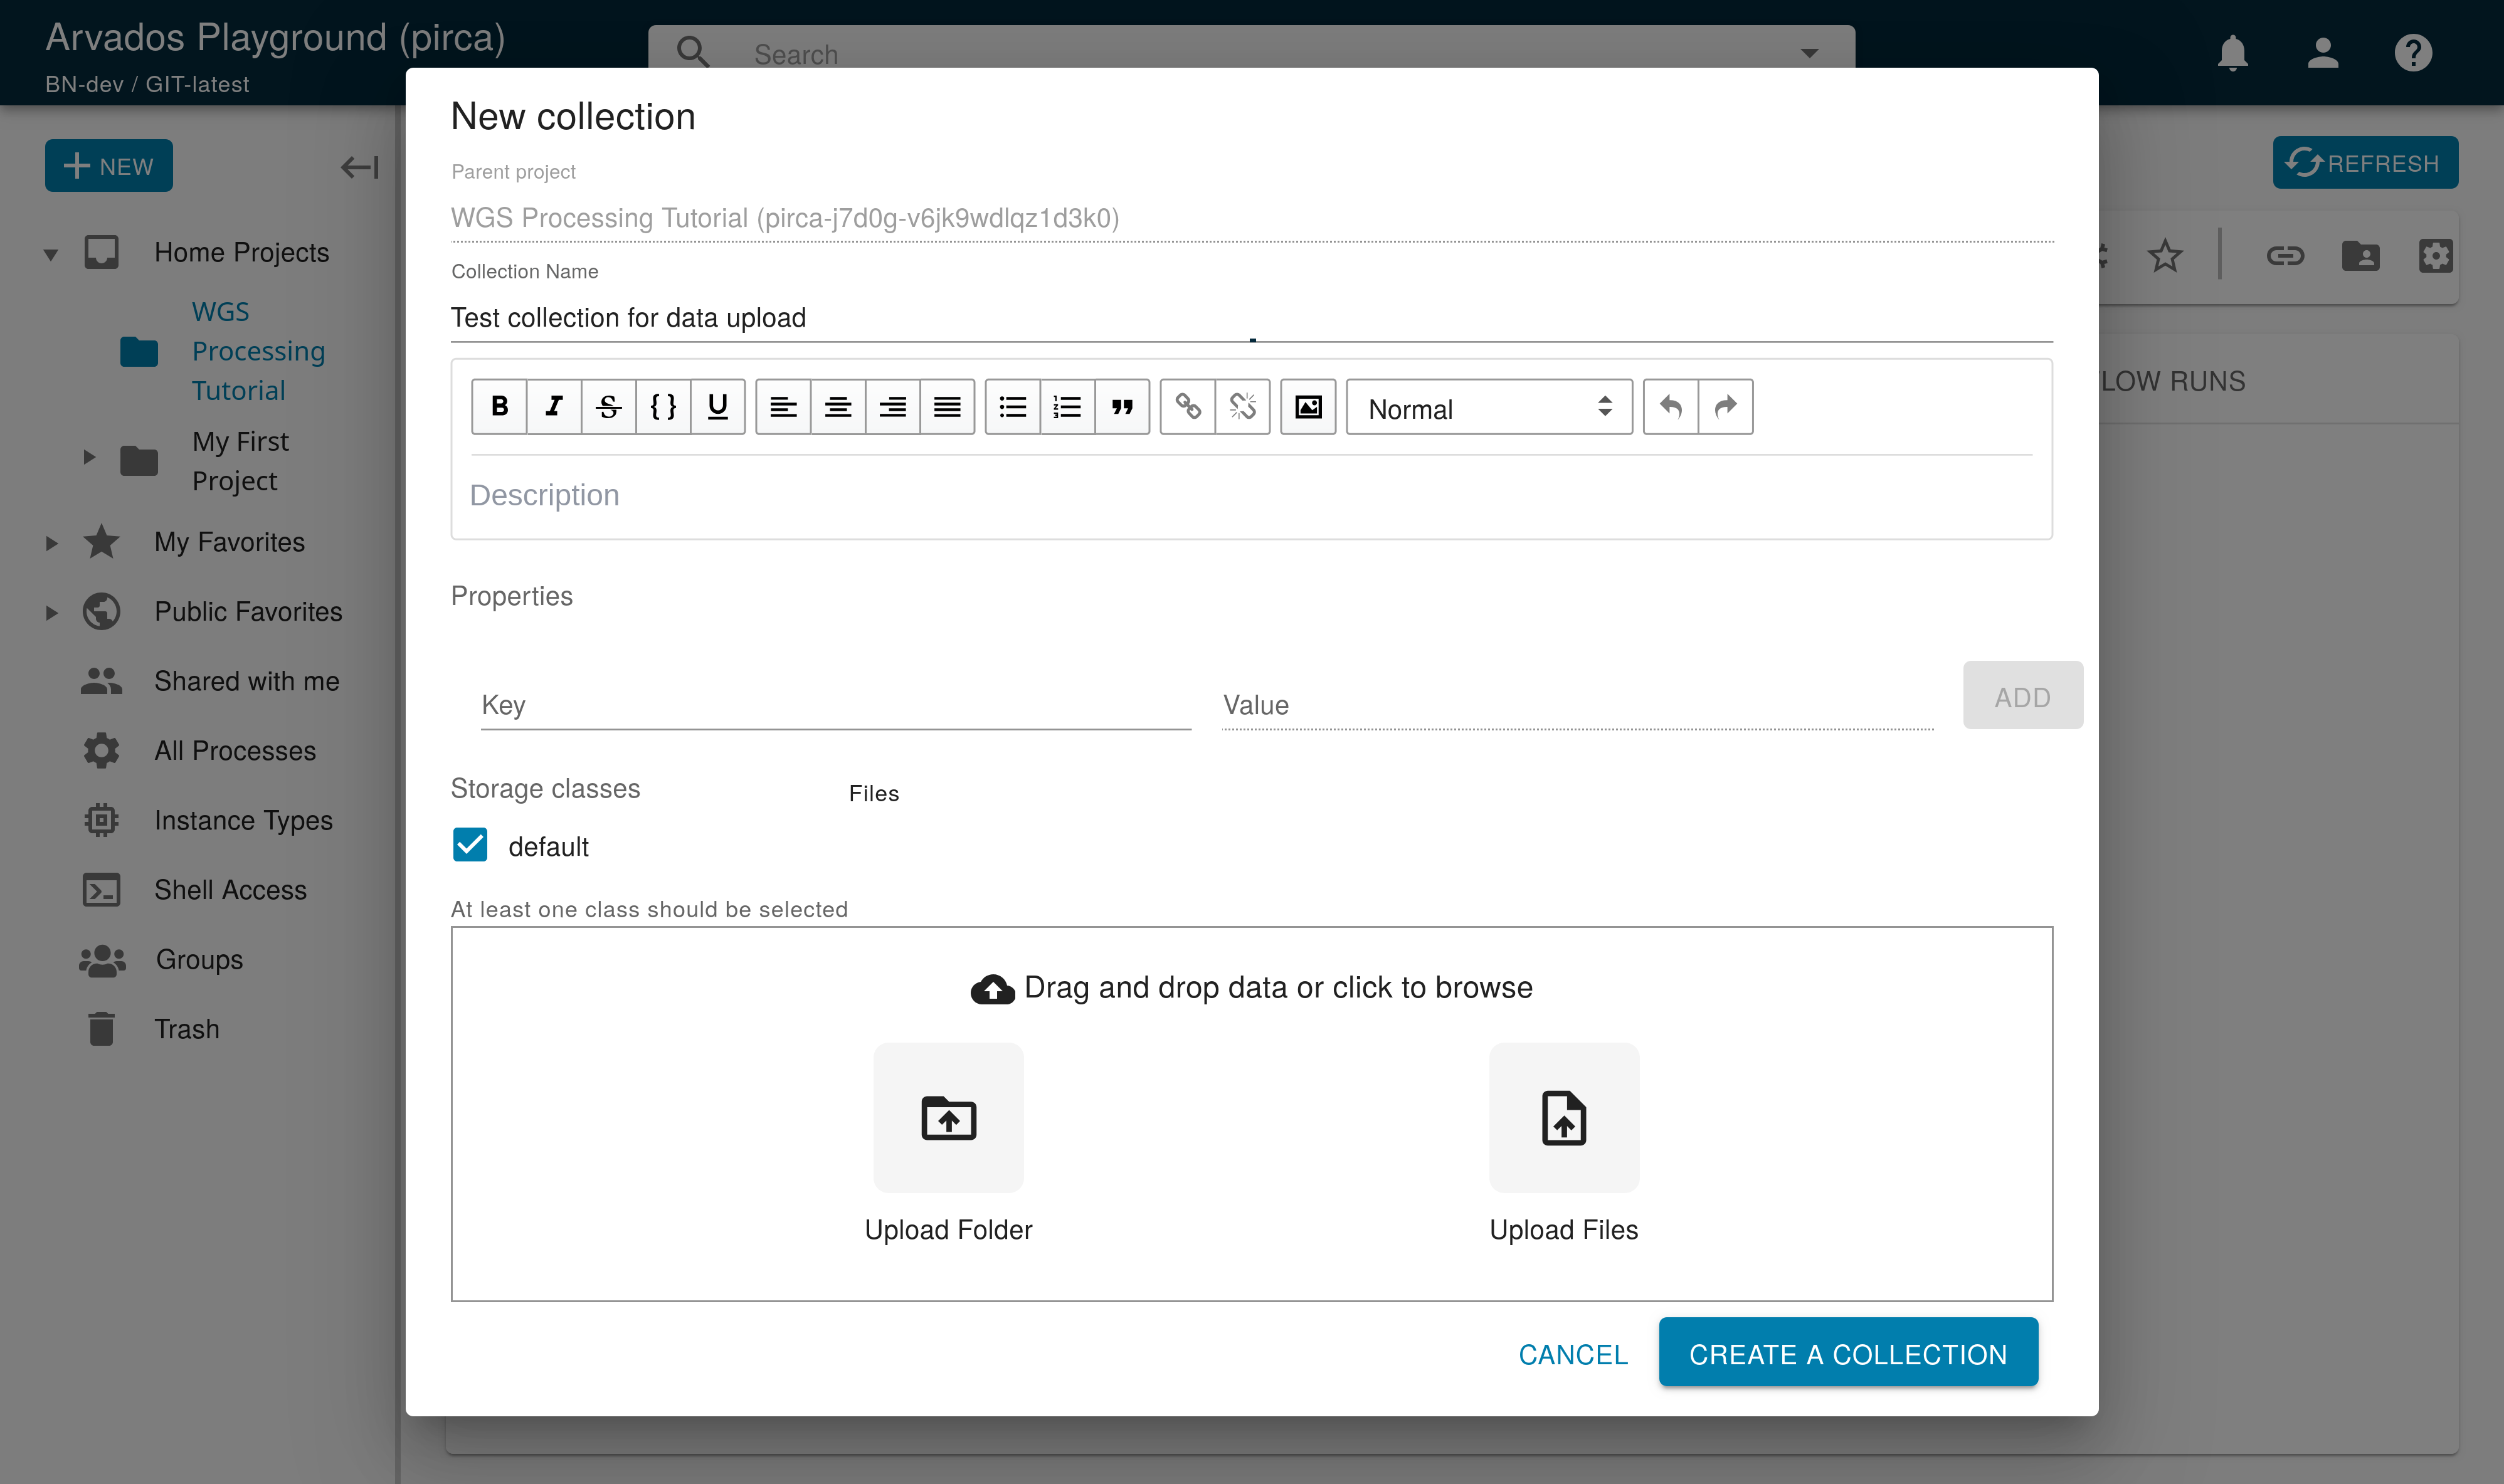
You can then click on the CREATE A COLLECTION button and proceed to the newly-created collection’s page. If you don’t upload any data when creating the collection, the new collection will be empty, and you can upload files into it later.
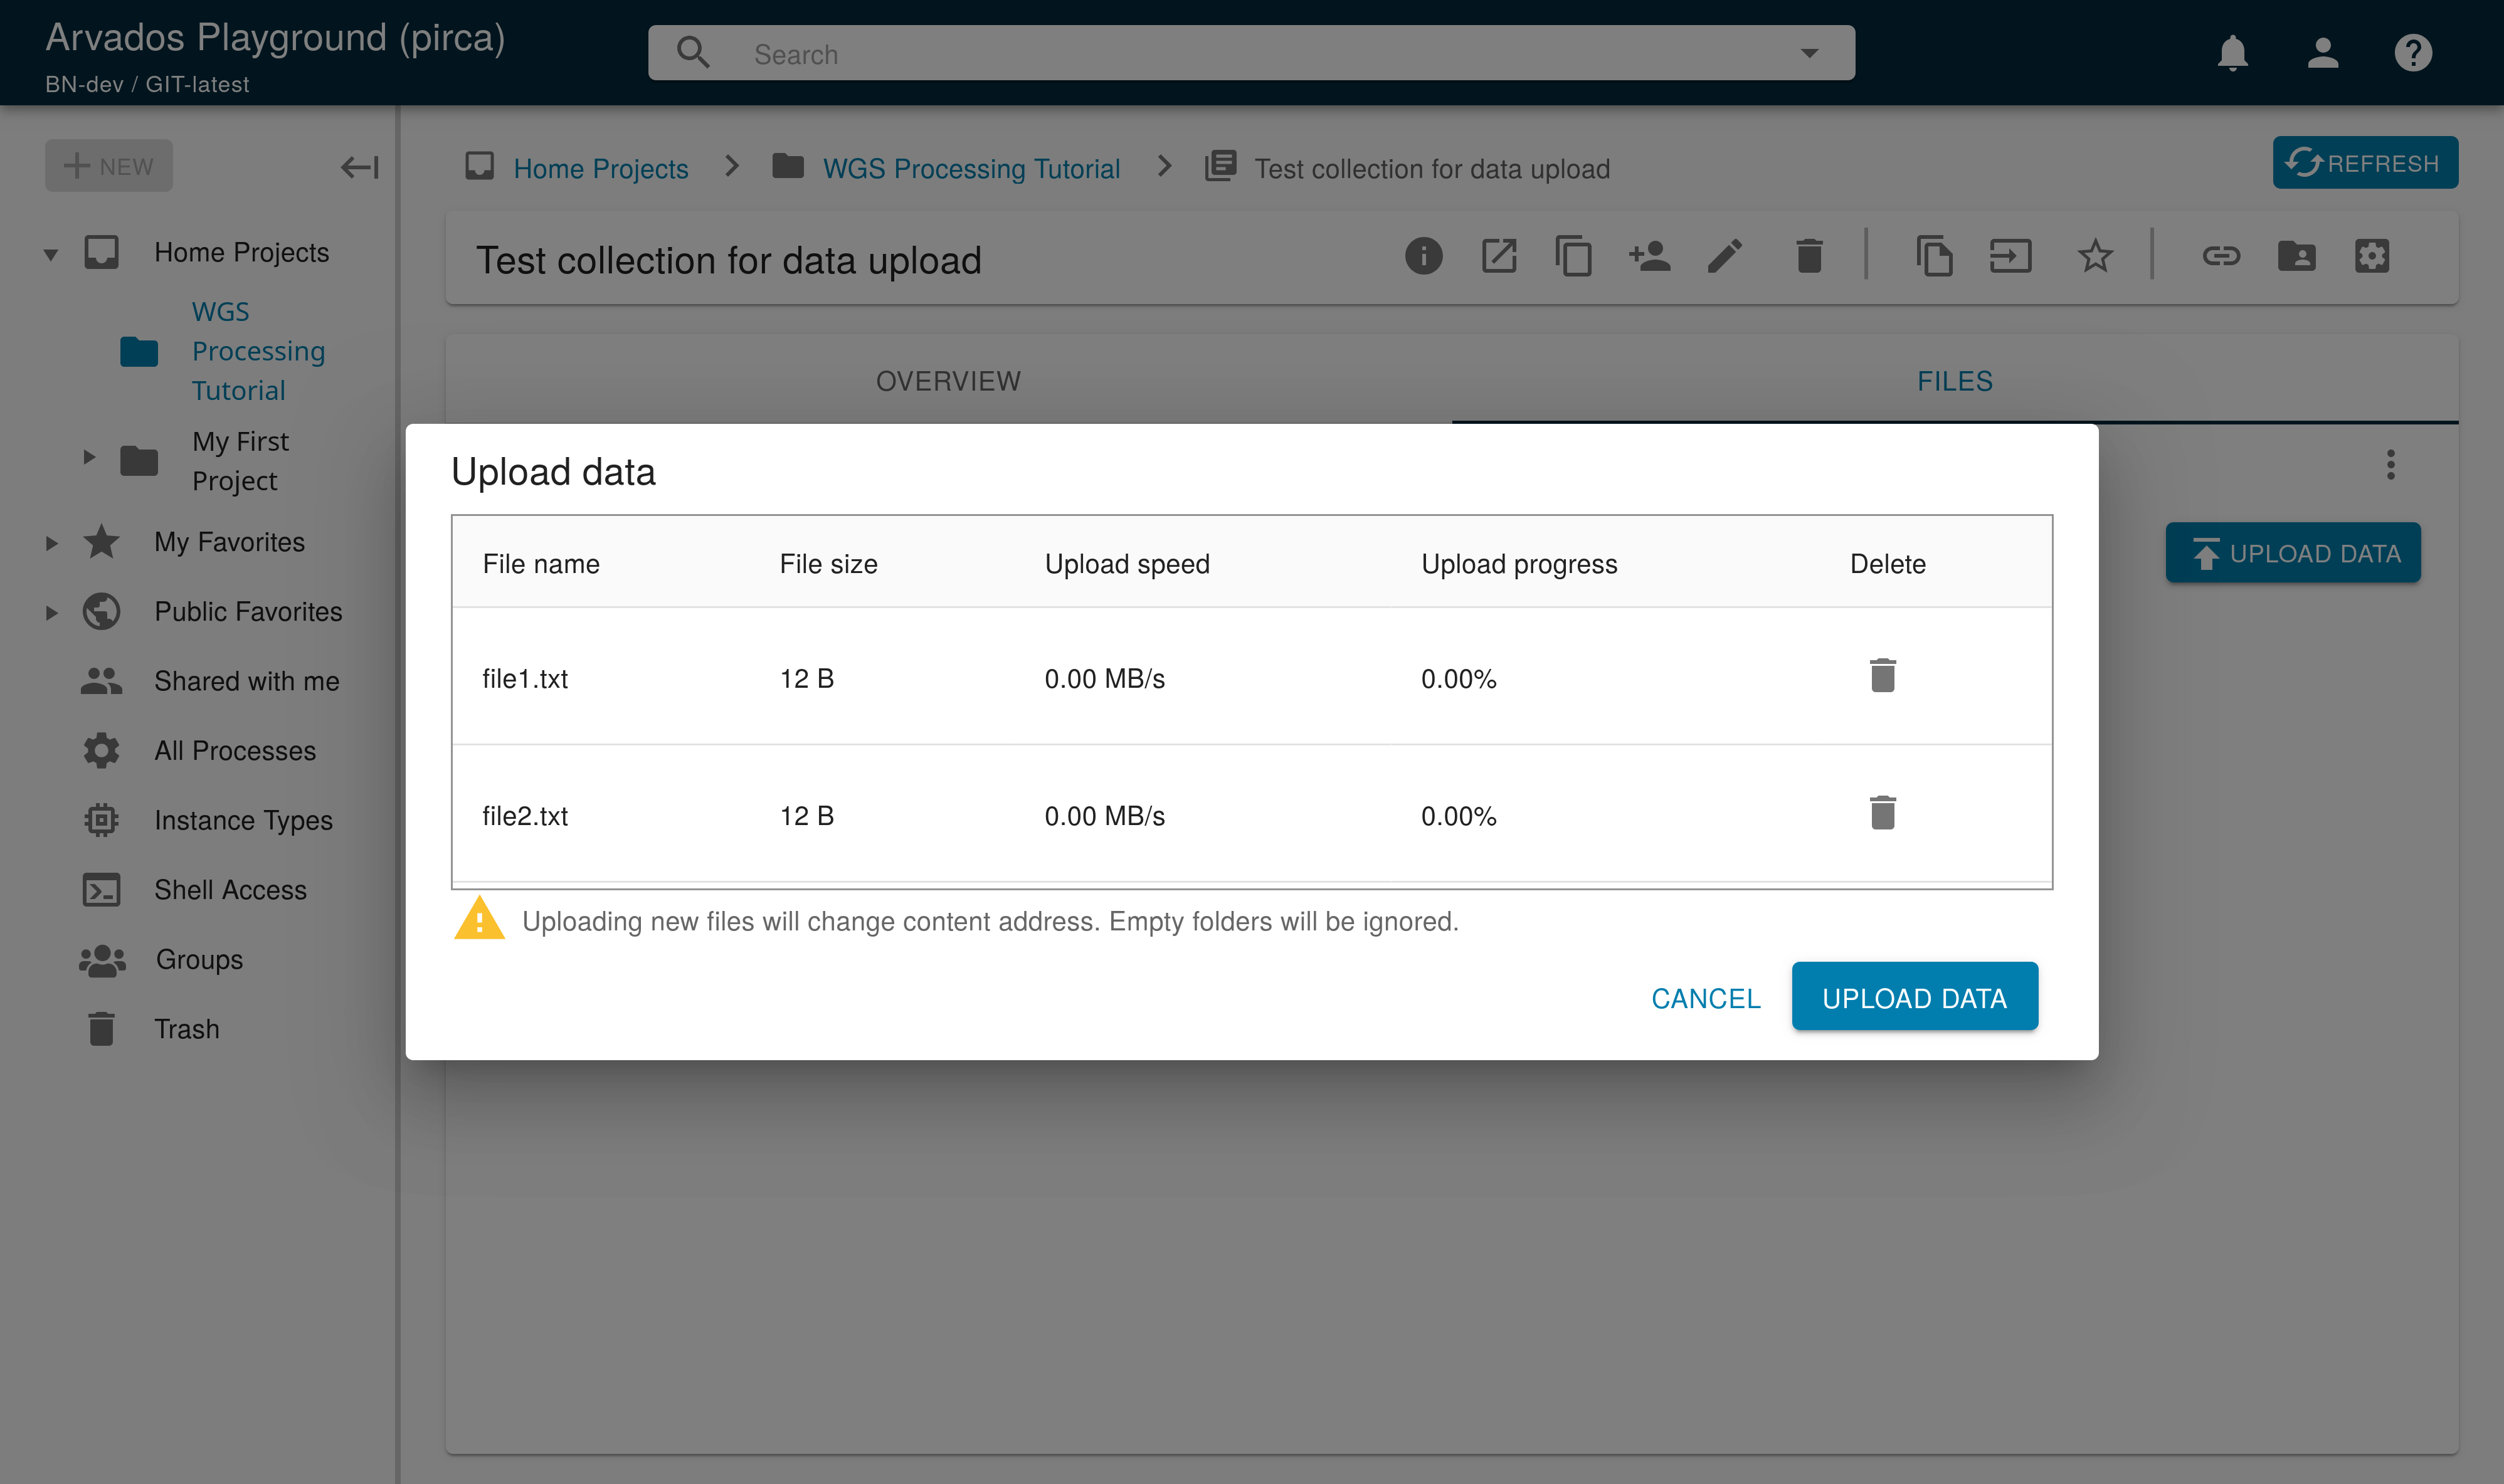
In the FILES tab, there is a button labeled UPLOAD DATA. Click on it, and you will be prompted to upload files by drag-and-drop or the file-selection dialog opened by your browser.
The files you choose to upload will then be displayed, and you can review them before clicking on the UPLOAD DATA button to initiate the actual file transfer.
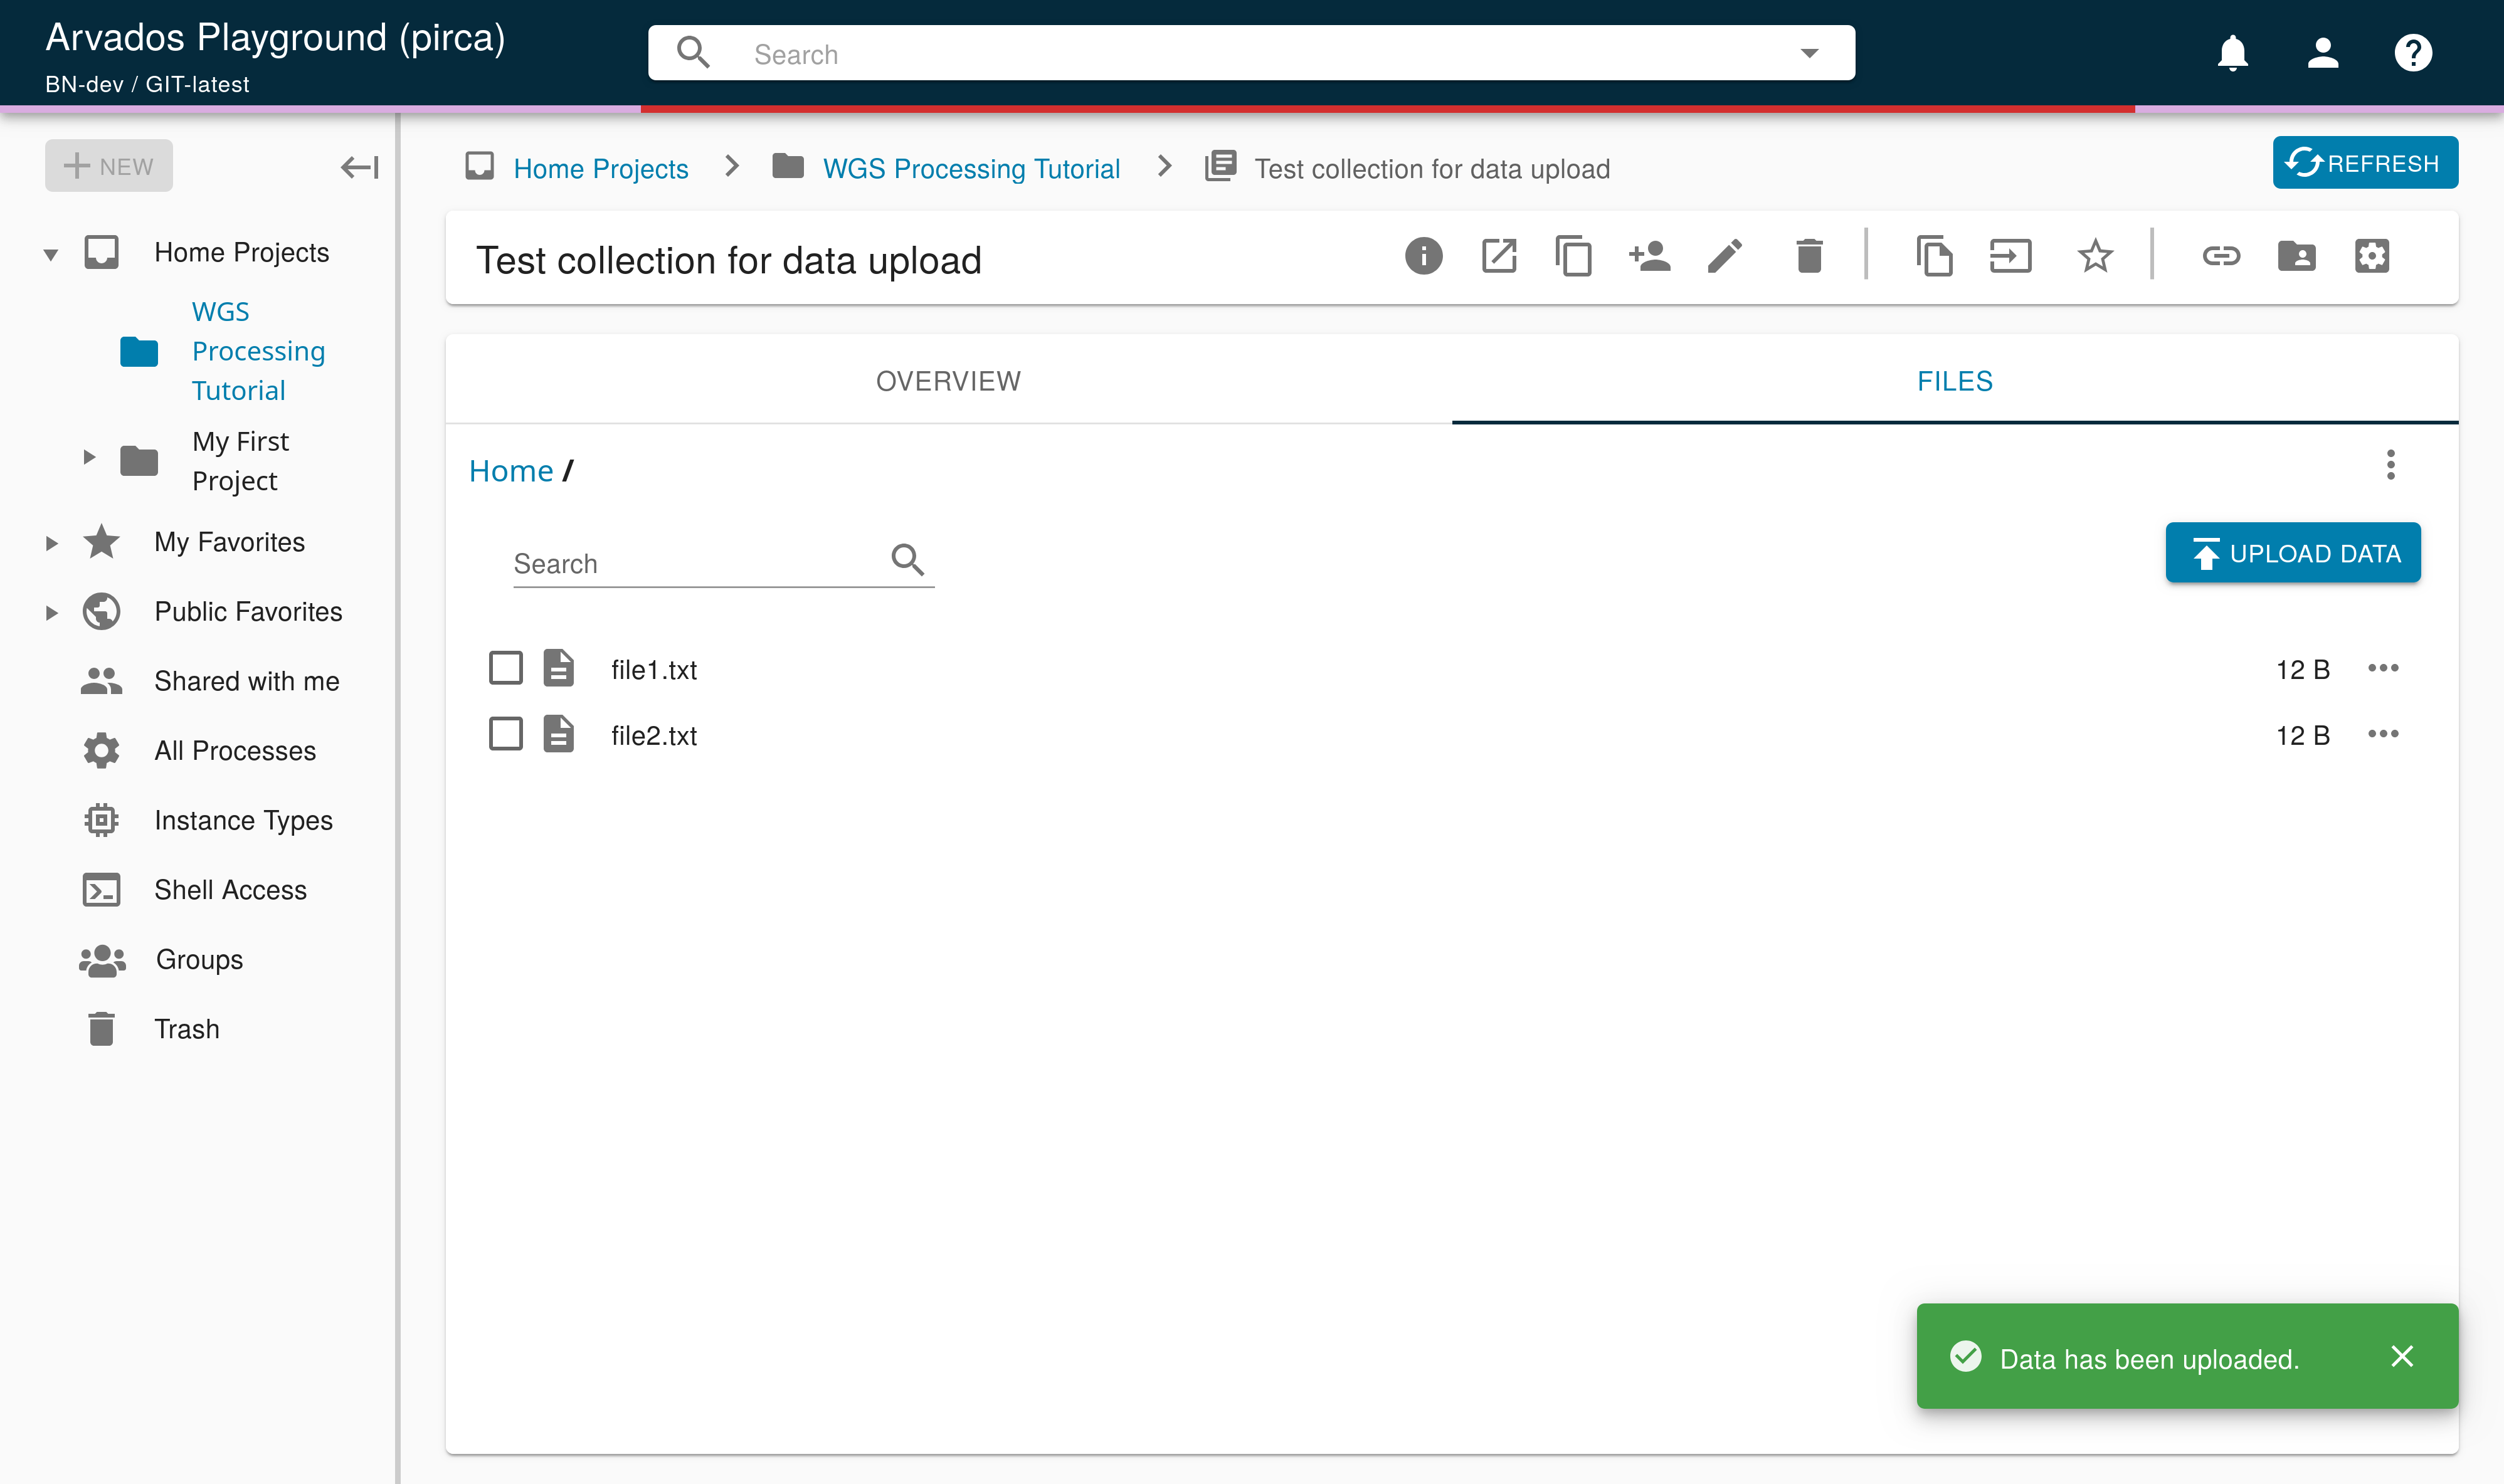
Once the file upload completes, you will be notified by a message, and the files will appear under the FILES tab shortly.
Note: If you leave the collection page during the upload, the upload process will be aborted and you will need to upload the files again.
Note: You can also use the UPLOAD DATA button to add additional files to an existing collection.
Upload using command line tool
Note:
This tutorial assumes that you have access to Arvados command line tools, configured your API token, and confirmed a working environment.
To upload a file to Keep using arv-put:
~$ arv-put var-GS000016015-ASM.tsv.bz2
216M / 216M 100.0%
Collection saved as ...
zzzzz-4zz18-xxxxxxxxxxxxxxx
The output value zzzzz-4zz18-xxxxxxxxxxxxxxx is the uuid of the Arvados collection created.
Note: The file used in this example is a freely available TSV file containing variant annotations from the Personal Genome Project participant hu599905), downloadable here. Alternatively, you can replace var-GS000016015-ASM.tsv.bz2 with the name of any file you have locally, or you could get the TSV file by downloading it from Keep.
It is also possible to upload an entire directory with arv-put:
~$ mkdir tmp
~$ echo "hello alice" > tmp/alice.txt
~$ echo "hello bob" > tmp/bob.txt
~$ echo "hello carol" > tmp/carol.txt
~$ arv-put tmp
0M / 0M 100.0%
Collection saved as ...
zzzzz-4zz18-yyyyyyyyyyyyyyy
In both examples, the arv-put command created a collection. The first collection contains the single uploaded file. The second collection contains the entire uploaded directory.
arv-put accepts quite a few optional command line arguments, which are described on the arv subcommands page.
Locate your collection in Workbench
Visit the Workbench and go to your Home Projects. Your newly uploaded collection should appear in the “Data” tab. The collection name printed by arv-put will appear under the Name column, and its Type will be “Data collection”.
Click on the collection’s name will lead you to its Workbench page, where you can see the collection’s contents and download individual files.
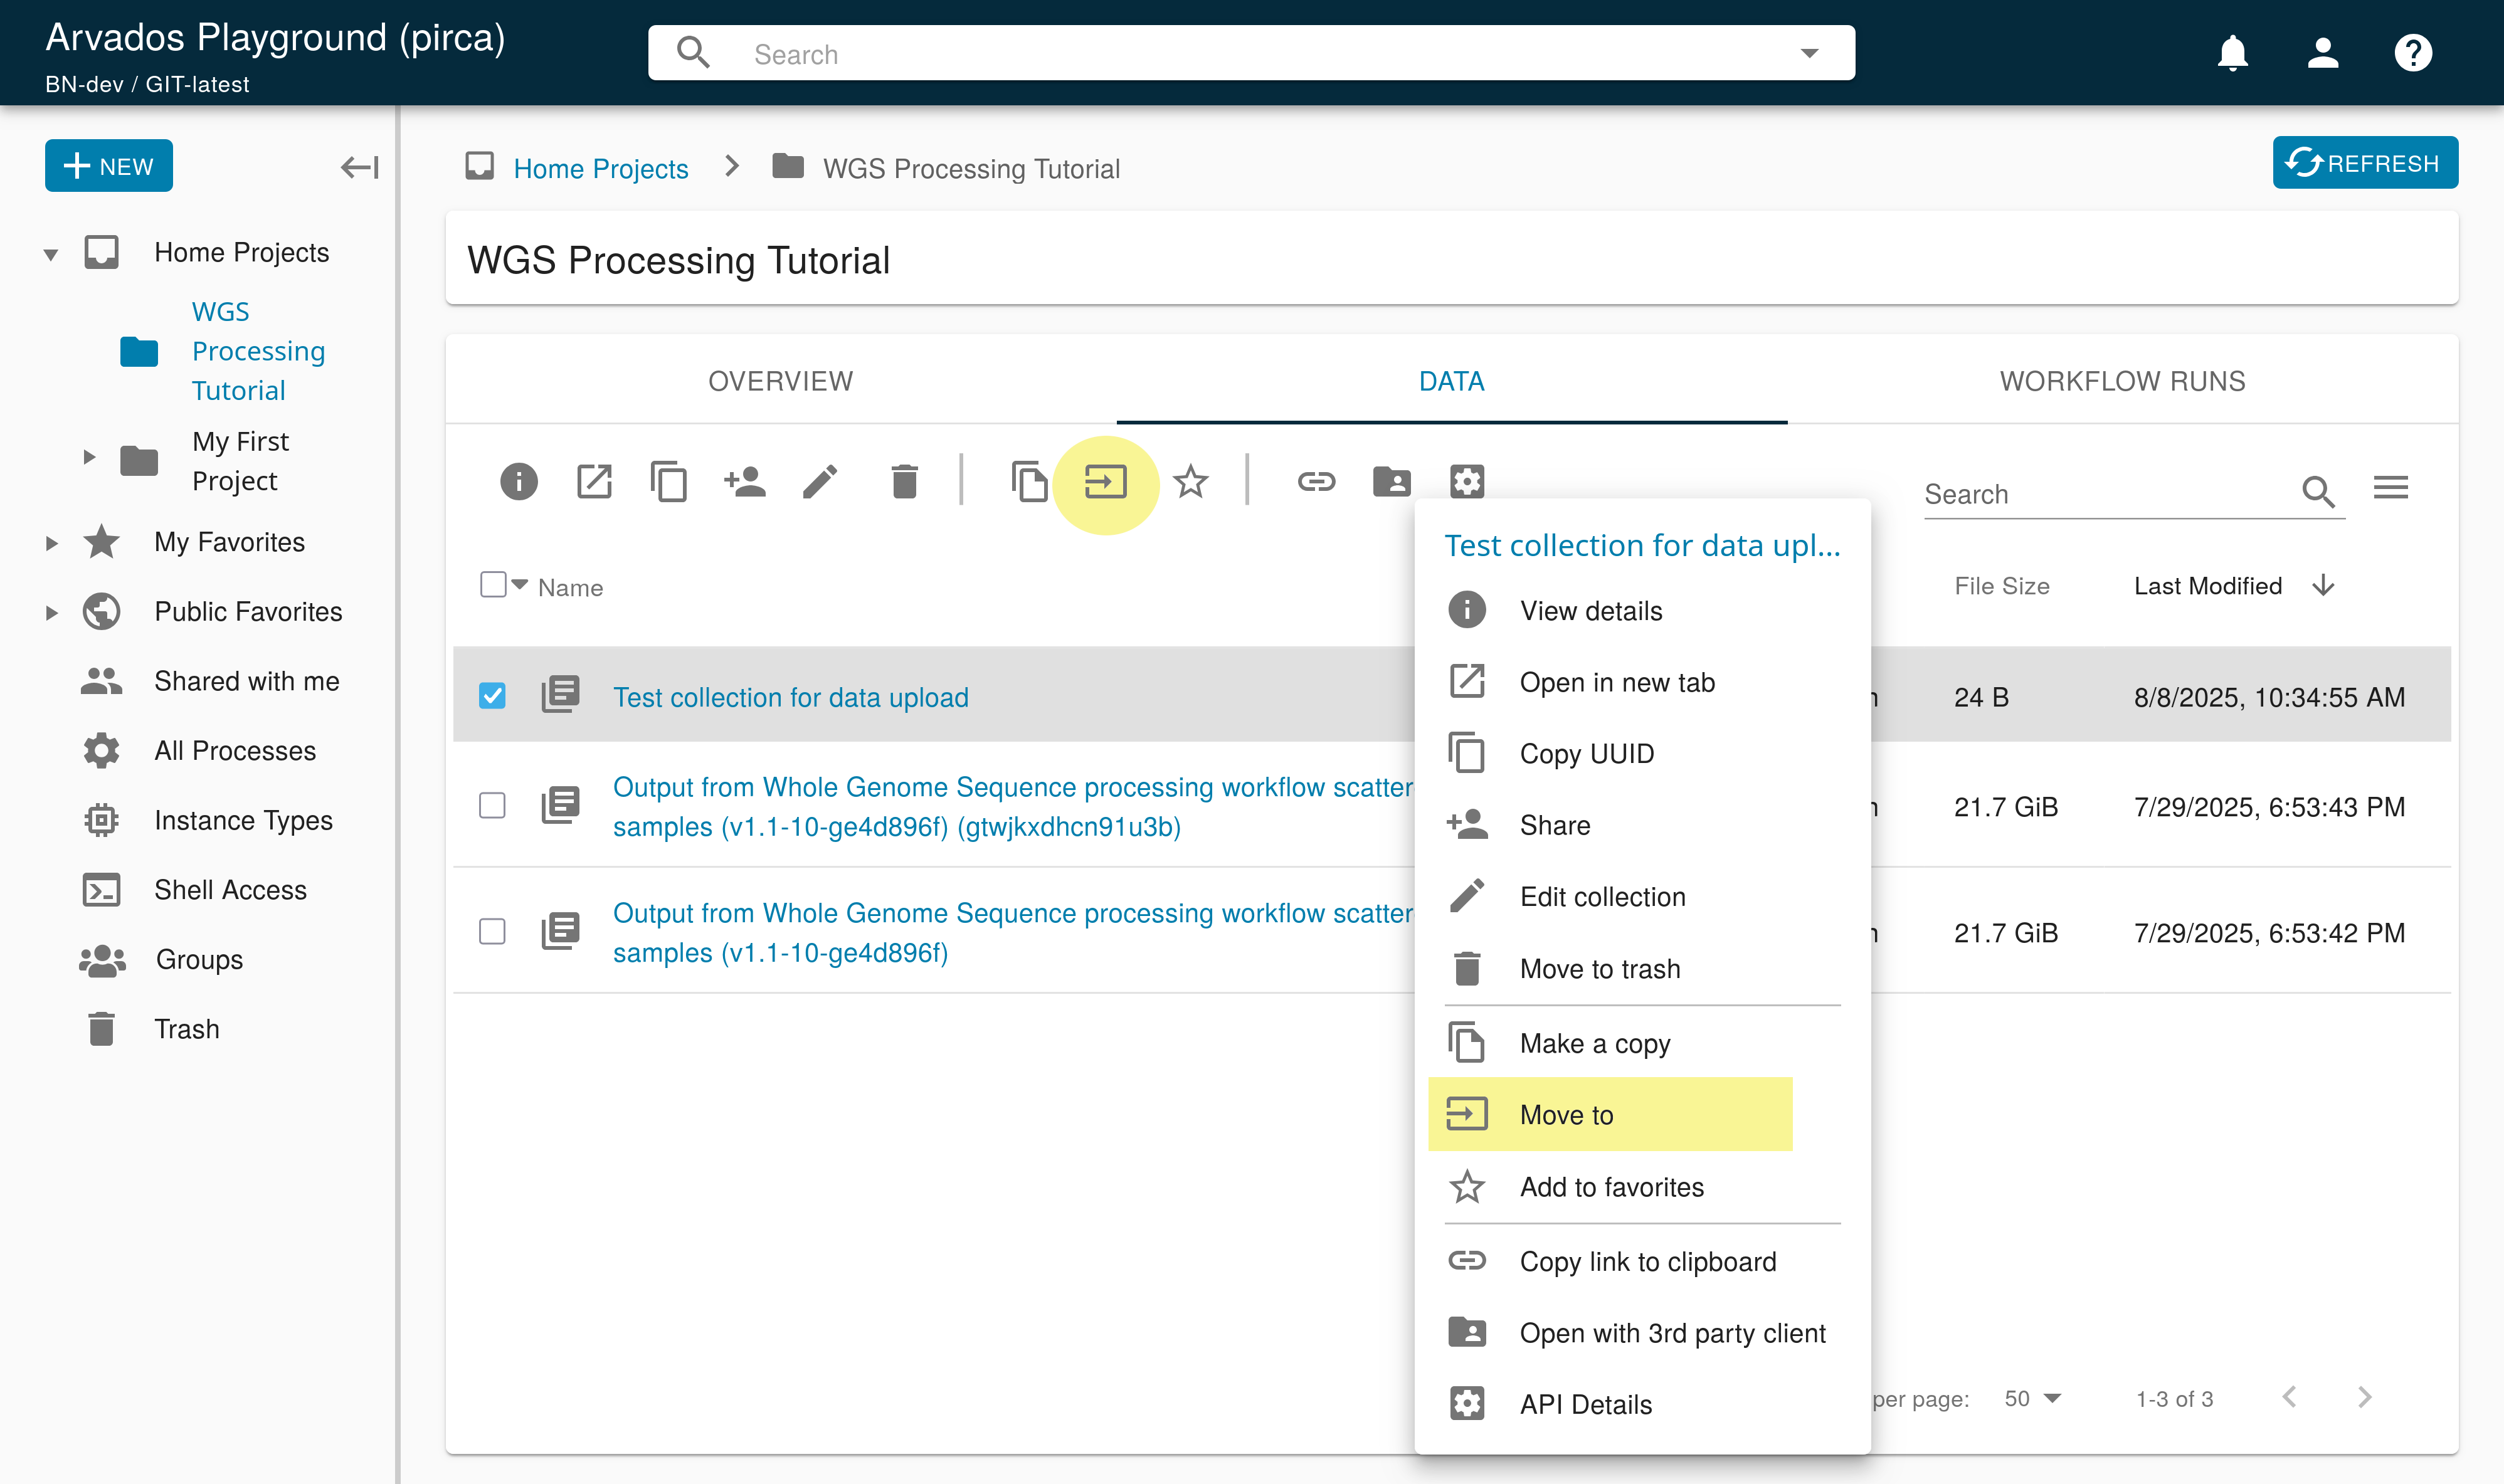
To move the collection to a different project, locate the collection and right-click on it. This will bring up a context menu with Move to. Click on this item, and you will see a dialog box where you can select the target project to move this collection to, by search or navigation. This menu is also available in the toolbar after clicking the checkbox next to the collection name in the “Data” tab.
Previous: Organizing data Next: Downloading data