Accessing an Arvados VM with SSH - Unix Environments
This document is for accessing an Arvados VM using SSH keys in Unix-like environments (Linux, macOS, Cygwin, Windows Subsystem for Linux). If you would like to access VM through your browser, please visit the Accessing an Arvados VM with Webshell page. If you are using a Windows environment, please visit the Accessing an Arvados VM with SSH – Windows Environments page.
Arvados requires a public SSH key in order to securely log in to an Arvados VM instance. The three sections below help you get started:
- Getting your SSH key
- Adding your key to Arvados Workbench
- Using SSH to log into an Arvados VM instance
Getting your SSH key
Generate a key using ssh-keygen
Start by opening a terminal window. Check if you have an existing public key:
$ ls ~/.ssh/id_rsa.pubIf the file id_rsa.pub exists, then you may use your existing key. Copy the contents of ~/.ssh/id_rsa.pub onto the clipboard (this is your public key). You can skip the rest of this section and proceed by adding your key to the Arvados Workbench.
If there is no file ~/.ssh/id_rsa.pub, you must generate a new key. Use ssh-keygen to do this:
$ ssh-keygen -t rsa -C "you@example.com"
Generating public/private rsa key pair.
Enter file in which to save the key (/home/example/.ssh/id_rsa):
Enter passphrase (empty for no passphrase):
Enter same passphrase again:
-tspecifies the key type (must be “rsa”)-Cspecifies a comment (to remember which account the key is associated with)
We strongly recommend that you protect your key with a passphrase. This means that when the key is used, you will be required to enter the passphrase. However, unlike logging into remote system using a password, the passphrase is never sent over the network; it is only used to decrypt your private key locally.
Display the contents of ~/.ssh/id_rsa.pub (this is your public key) using cat, and then copy it onto the clipboard. The content of the public key may look similar to the following example:
$ cat ~/.ssh/id_rsa.pub
ssh-rsa AAAAB3NzaC1ycEDoNotUseExampleKeyDoNotUseExampleKeyDoNotUseExampleKeyDoNotUse9lmzkpBq983bQradKGT3LuKda9QOGe8MatI6wzSrJLSGhHm3hk6D8OWWUG4SneuCtKIk2bH0pgBj1G29+uzDIez90WzfCTZKbz4RcVQmPkowSSUAQDwb0ffwvRDhCgcJ1loT1wQAJzqJmljQ7xEYaCOIMqnfYE0lX7B3MSvCV6Ie2rWL33YecLp48LVtqiCOZU4XRyO8RSDFRFLVW+mjkLirwtDHZCRtORScaIEN0jw51p+T+9X5iA9QH/Mn+xlgk7fCgH+JtpBj808N/Qds2Gpff+Kb6ulUrVVfMK6L you@example.com
- The above is a specimen that cannot be used as a valid public key.
Now you can set up ssh-agent (next) or proceed with adding your key to the Arvados Workbench.
Set up ssh-agent (optional)
If you find you are entering your passphrase frequently, you can use ssh-agent to manage your credentials. Use ssh-add -l to test if you already have ssh-agent running:
$ ssh-add -lIf you get the error “Could not open a connection to your authentication agent”, you will need to run ssh-agent with the following command:
$ eval "$(ssh-agent -s)"ssh-agent -s runs an agent process in the background to hold your SSH credentials, and it prints out the values of environment variables SSH_AUTH_SOCK and SSH_AGENT_PID. By applying the shell builtin eval to this output, as we show here using the shell command-substitution syntax, we set those variables in the current shell environment. In this way, subsequent invocations of ssh in this shell session will be able to access the agent process for the credentials without asking you each time.
After running ssh-agent, or if ssh-add -l prints “The agent has no identities”, add your private key to the SSH agent using the following command. The passphrase to decrypt the key is the same one used to protect the key when it was created with ssh-keygen:
$ ssh-add
Enter passphrase for /home/example/.ssh/id_rsa:
Identity added: /home/example/.ssh/id_rsa (/home/example/.ssh/id_rsa)
When everything is set up, ssh-add -l should yield output that looks like this:
$ ssh-add -l
2048 eb:fa:15:f2:44:26:95:58:37:37:f4:aa:ff:ee:c2:85 you@example.com (RSA)
You may now proceed to adding your key to the Arvados Workbench.
Adding your key to Arvados Workbench
In the Workbench top navigation menu, click on the dropdown menu icon to access the Account Management menu. Then, click on the menu item Ssh keys to go to the SSH keys page. Click on the + ADD NEW SSH KEY button in the upper-right on that page. You will see a popup as shown in this screenshot:
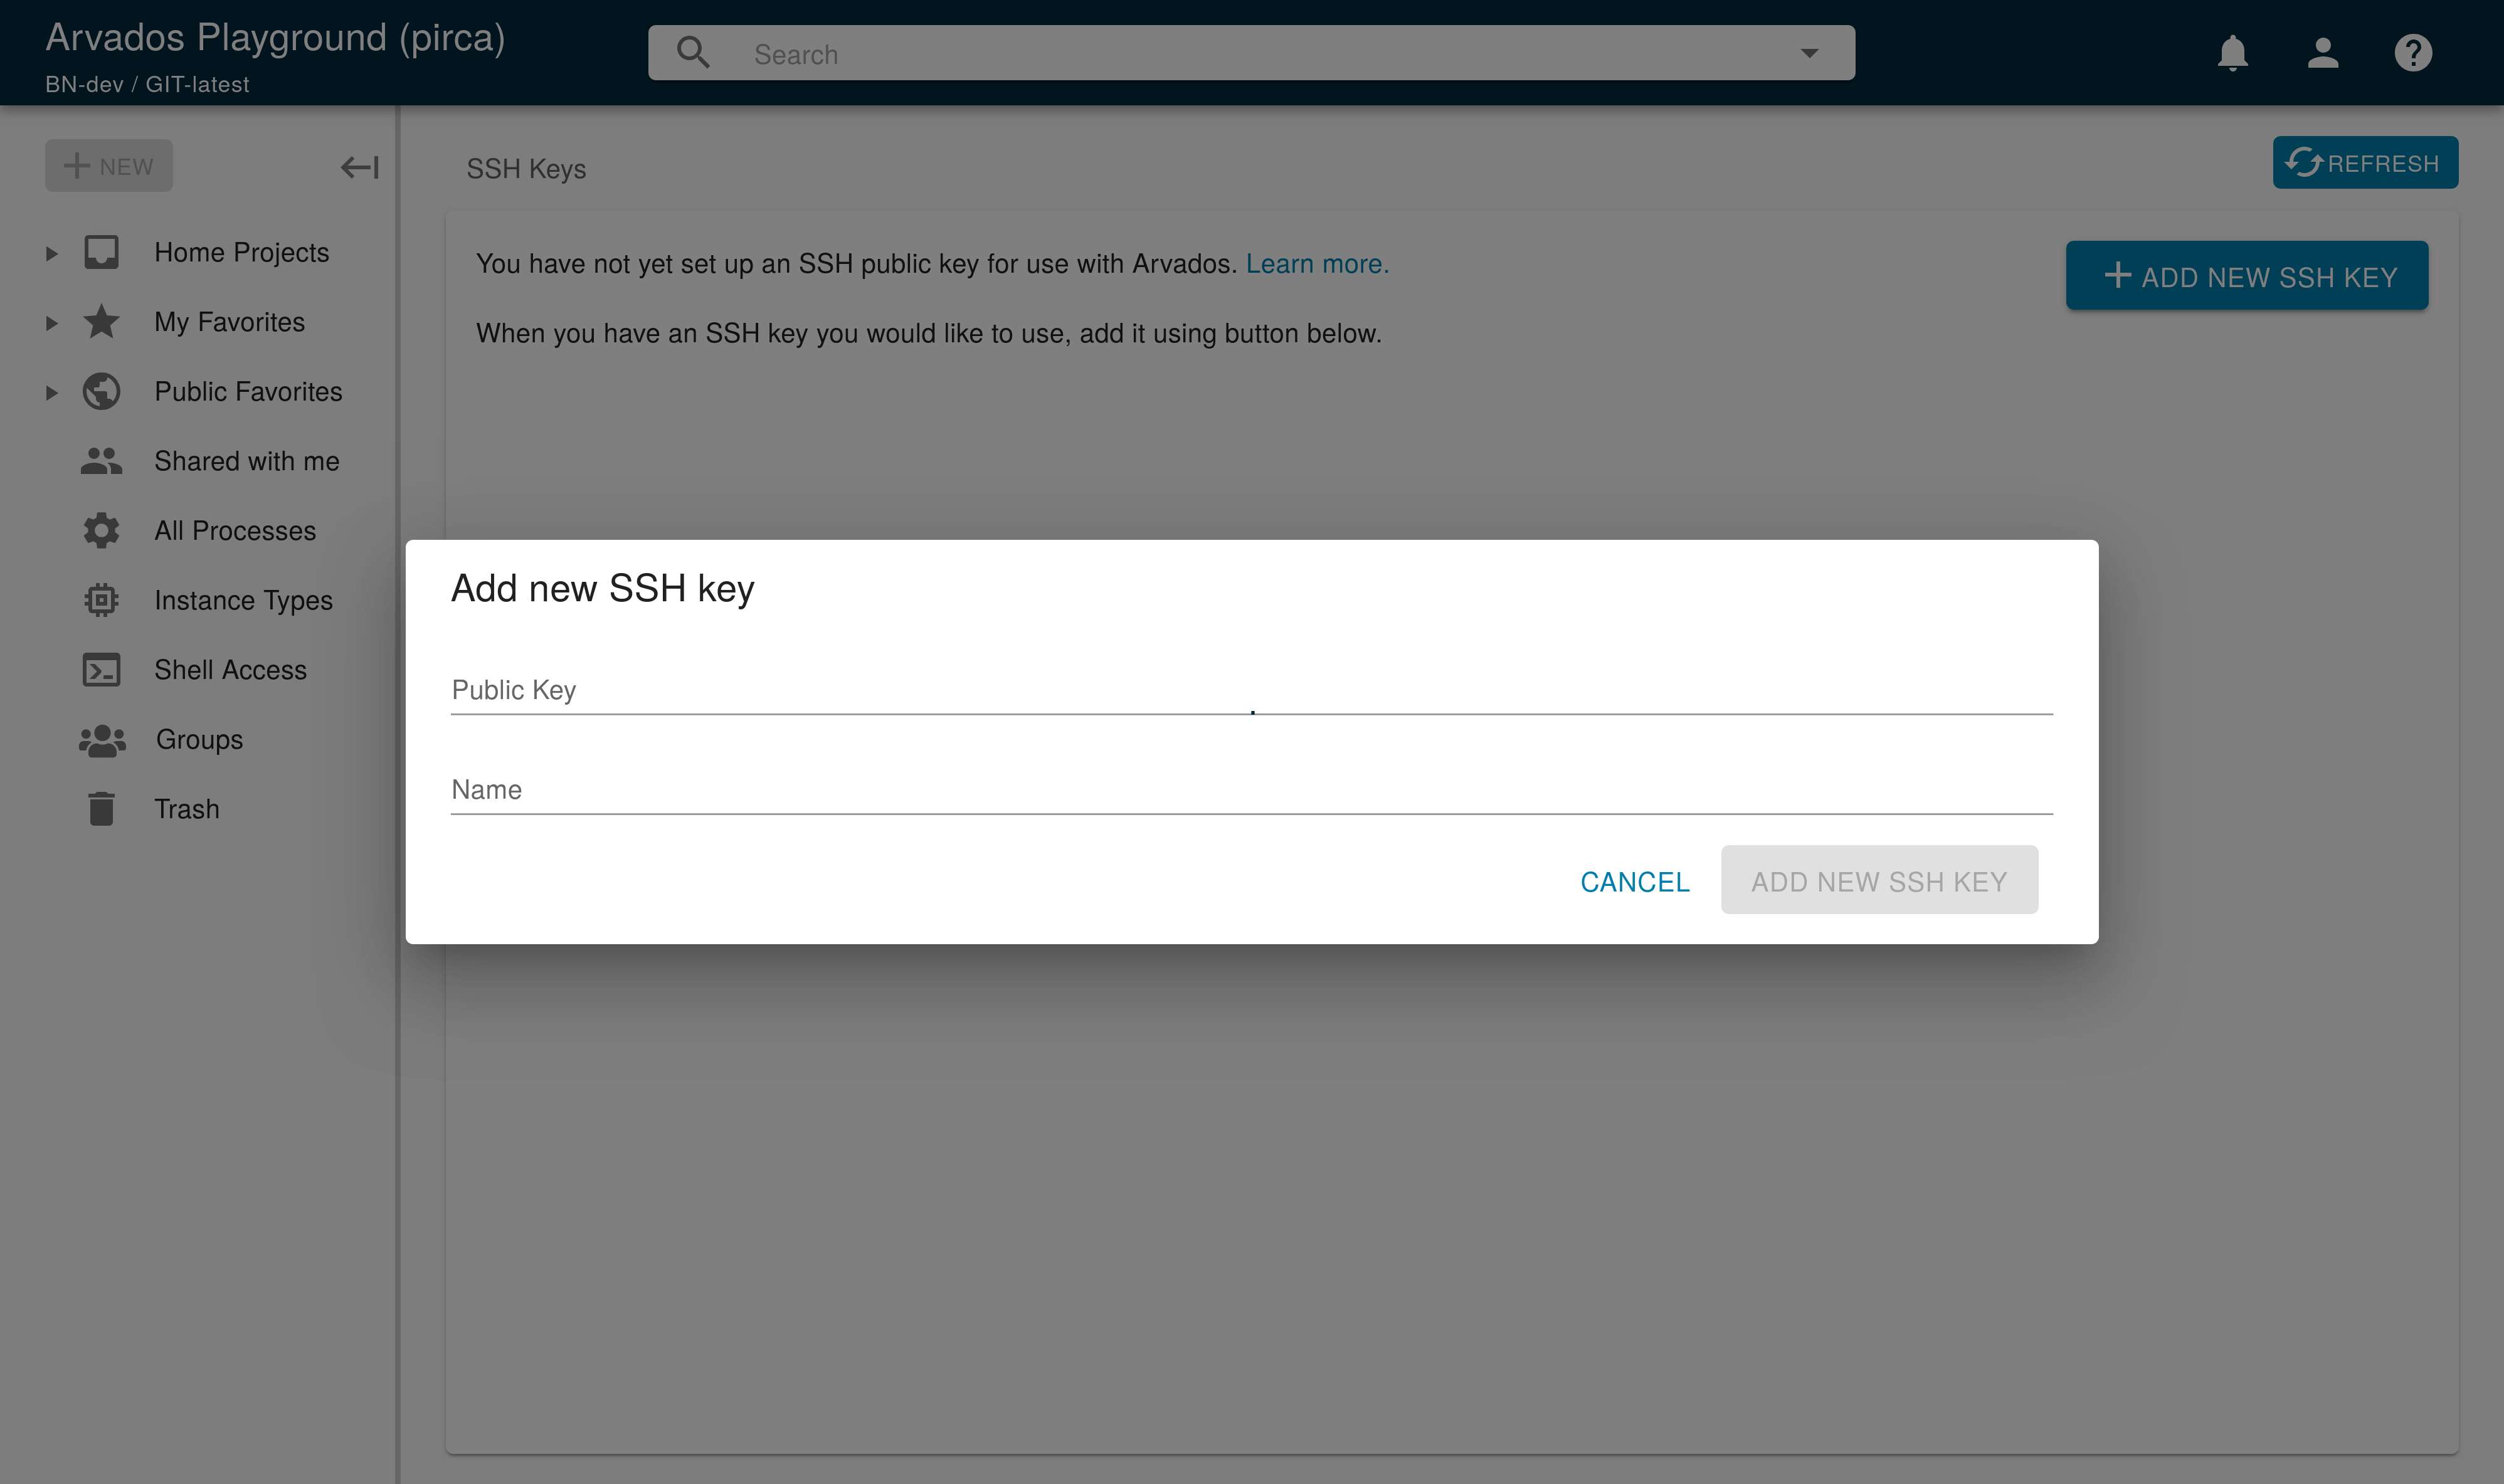
Paste your public key into the text area labeled Public Key, and click on the ADD NEW SSH KEY button in lower-right. You are now ready to log into an Arvados VM.
Using SSH to log into an Arvados VM
To see a list of virtual machines that you have access to, click on the dropdown menu icon in the upper right corner of the top navigation menu to access the Account Management menu. Then, click on the menu item Virtual Machines.
You will then see a page that lists the virtual machines you can access. The Host name column lists the name of each available VM. The Login name column lists your login name on that VM. The Command line column provides a sample ssh command.

At the bottom of the page there may be additional instructions for connecting your specific Arvados instance. If so, follow your site-specific instructions. If there are no site-specific instructions, you can probably connect directly with ssh.
The following are generic instructions. In these examples, the login name will be you and the host domain will be ClusterID.example.com. Replace these with your login name and hostname as appropriate.
Connecting directly
If the VM is available on the public Internet (or you are on the same private network as the VM), you can connect directly with ssh. You can copy-and-paste the text from the Command line column (see the screenshot above) directly into a shell session.
Use the following example command to connect, as the user “you” to the VM instance at the hostname “shell.ClusterID.example.com”. Replace you@shell.ClusterID.example.com at the end of the following command with your actual login and hostname from Workbench.
$ ssh you@shell.ClusterID.example.comConnecting through switchyard
Some Arvados installations use “switchyard” to isolate shell VMs from the public Internet. In such cases, you cannot log in directly to virtual machines over the public Internet. Instead, you log into a “switchyard” server and then tell the switchyard which virtual machine you want to connect to.
Use the following example command to connect to the shell VM instance as you. Replace you@shell at the end of the following command with your login and hostname from Workbench:
$ ssh -o "ProxyCommand ssh -p2222 turnout@switchyard.ClusterID.example.com -x -a shell" -x you@shellThis command does several things at once.
-o "ProxyCommand ..."configures SSH to run the specified command to create a proxy and route your connection through it.-p2222specifies that the switchyard is running on non-standard port 2222.turnout@switchyard.pirca.arvadosapi.comspecifies the user (turnout) and hostname (switchyard.pirca.arvadosapi.com) of the switchyard server that will proxy our connection to the VM.-xtells SSH not to forward your X session to the switchyard.-atells SSH not to forward your ssh-agent credentials to the switchyard.shellis the host name of the VM that we want to connect to. In summary, the string inside the quotation marks is sent to the switchyard server, as if it were an SSH command, and the switchyard server connects to the VM on our behalf.- After the
ProxyCommandsection, we repeat-xto disable X session forwarding to the virtual machine. - Finally,
you@shellspecifies your login name and repeats the hostname of the VM. The username can be found in the logins column in the VMs Workbench page, discussed in the previous section.
You should now be able to log into the Arvados VM and check your environment.
Configuration (recommended)
The command line above is cumbersome, but you can configure SSH to remember many of these settings. Add this text to the file .ssh/config in your home directory (create a new file if .ssh/config doesn’t exist):
Host *.pirca
  TCPKeepAlive yes
  ServerAliveInterval 60
  ProxyCommand ssh -p2222 turnout@switchyard.pirca.arvadosapi.com -x -a $SSH_PROXY_FLAGS %h
  User you
This will recognize any host ending in “.pirca” and automatically apply the proxy, user and forwarding settings from the configuration file, allowing you to log in with a much simpler command:
$ ssh shell.pircaYou should now be able to log into the Arvados VM and check your environment.
Previous: Accessing an Arvados VM with Webshell Next: Accessing an Arvados VM with SSH - Windows Environments